Growing up in the Philippines, I never needed a car. Life moved to the rhythm of iconic jeepneys, buses, and tricycles that could take you anywhere you needed to go. Later, I spent nearly six years in Dubai, a city with world-class public transportation. The interconnected metro lines and strategically placed bus stations made commuting effortless and efficient. However, now that I am in Florida, navigating the roads requires a different approach, and the Florida Learner’s Permit Guide has been invaluable for getting started.
When I moved to Florida, I was surprised by the sparse public transportation options. The infrequent buses with limited routes were a stark contrast to the bustling systems I knew. My husband confirmed my fears, explaining that relying on buses for a daily commute wasn’t practical. I realized I had to learn to drive, a daunting thought since I had never once been behind the wheel.
As an immigrant on a K1 visa and not yet a U.S. resident, the process felt overwhelming. My husband and I researched the requirements, and I embarked on the journey to get my very first driver’s license. Here is the step-by-step guide I created from my experience to help you navigate yours.
Table of contents
Step 1: Gathering Your Documents
Before anything else, you need to gather the required documents. While the Florida Highway Safety and Motor Vehicles (FLHSMV) website provides a complete list, here are the specific documents I presented as an immigrant waiting for the 1-485 application for Adjustment of Status (Green Card) is approved:
- Primary Identification: You must provide your original, physical ID.
- Important: For immigrants waiting for their 1–485 Adjustment of Status or Green Card application you need to provide your Work Authorization card. Learn how to apply for I-765 work authorization.
- Proof of Social Security: I submitted my original Social Security card and a paystub.
- Proof of Residential Address: To prove I live in Florida, I used our tenancy contract (which included my name) and an account opening letter from my bank that showed my address.
Step 2: Preparing for the Class E Knowledge Exam
While waiting for official documents like my work authorization, I decided to use the time productively by studying for the Florida Class E Knowledge Exam. Here’s how I prepared:
Download the Florida Driver’s Handbook
My husband suggested I download the Florida Driver’s Handbook, and it was a game-changer. This free handbook contains everything you need to know for the written test, the road test, and safe driving in general. I saved it on my phone so I could review it anytime. Download the handbook at the Florida Highway Safety and Motor Vehicles (FLHSMV) website here.
Take Practice Tests
The practice test at the end of the handbook is a must-do. I found it incredibly helpful because many of the questions appeared on the actual exam. Take it seriously to boost your confidence and increase your chances of passing. I also used a free mobile app called “DMV Written Test” to practice key concepts.
Complete the TLSAE Course
As a first-time driver in Florida, I had to complete the Traffic Law and Substance Abuse Education (TLSAE) course before taking the written test. I chose a convenient online option, which took about four hours to finish the night before my exam.
Initially, we weren’t sure if this course was mandatory, but our research confirmed that you must present the completion certificate at the DMV. Although the system usually sends the certificate to the DMV electronically, the staff asked for my printed copy, so I was glad I brought one.
Step 3: Scheduling Your Written Test Appointment Online
Booking the appointment online was confusing at first. On our first try, we accidentally booked a “driver’s license” appointment instead of a “written permit test.” When I arrived at the DMV at 3:30 PM, the staff told me they couldn’t administer the test because the last appointment is at 3:00 PM. I had to reschedule.
To avoid our mistake, follow these steps to book your appointment in Brevard County:
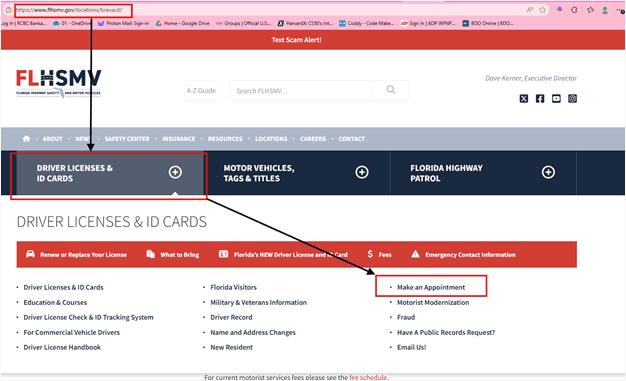
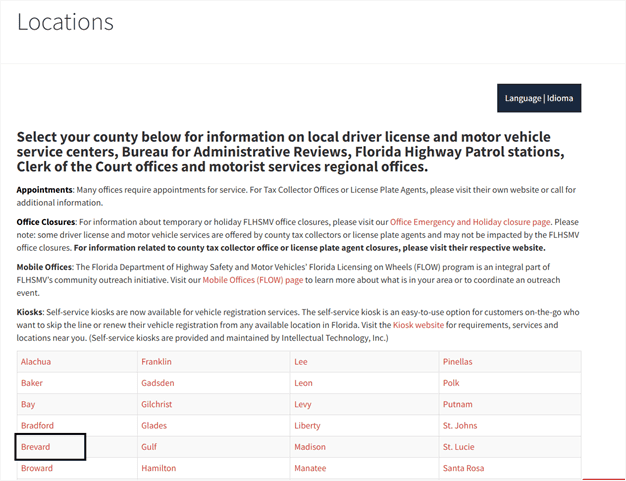
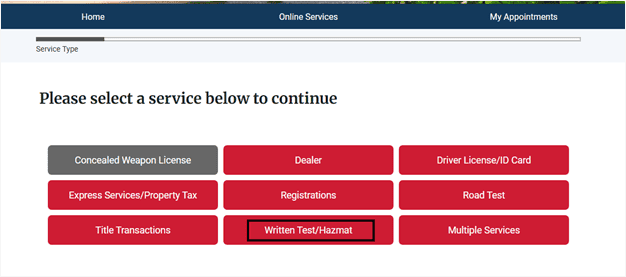
- Visit the FLHSMV Website: Go to the official site and select your county (e.g., Brevard).
- Navigate to Appointments: Under the “Driver Licenses & ID Cards” section, click “Make an Appointment.”
- Choose a Location: Pick the most convenient branch office. I chose the Palm Bay Branch because it was the closest to my home.
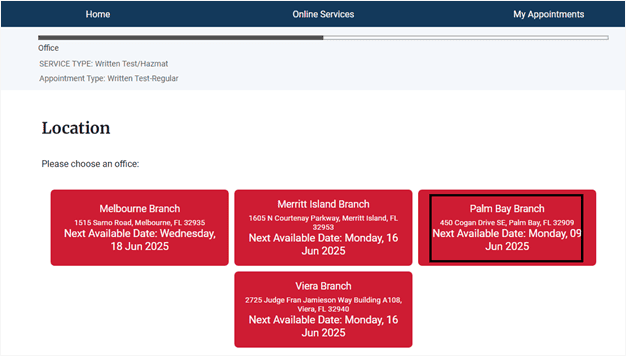
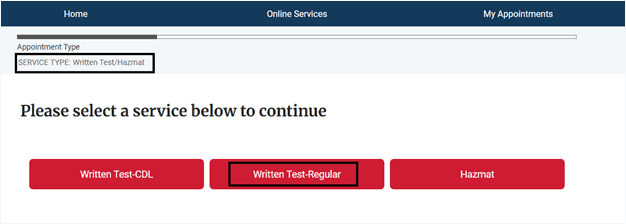
- Select the Service Type: Choose “Written Test/Hazmat.”
- Specify the Test: Select “Written Test-Regular.”
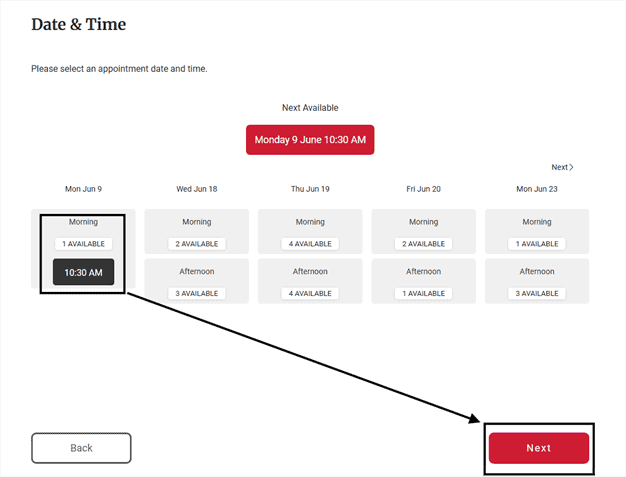
- Select Date and Time: Pick an available slot that fits your schedule and click “Next.”
- Enter Your Information: Fill in your personal details and click “Next” to confirm.
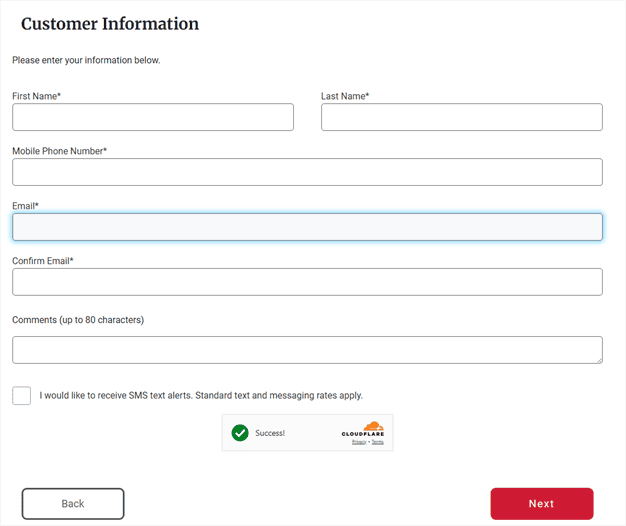
You will receive an email confirmation. Keep it handy for your appointment day.
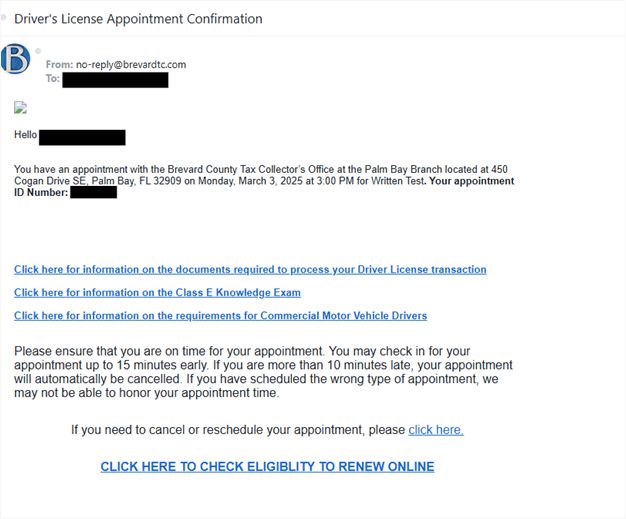
Step 4: What to Expect on Test Day
Arrival and Check-In
Arrive at the DMV at least 15 minutes early and bring all your documents. At the entrance, you will find a QR code to check in.
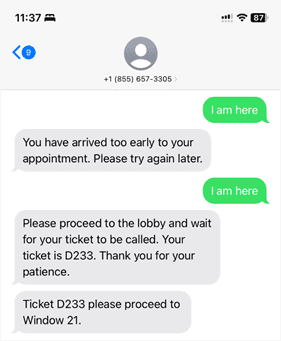
Here’s how the check-in process works:
- Scan the QR code at your exact appointment time. If you scan it too early, the system won’t generate a token.
- The code will prompt you to send a pre-filled text message: “I am here.”
- You will receive a reply with your token number.
- Proceed into the lobby and wait for your number to be called.
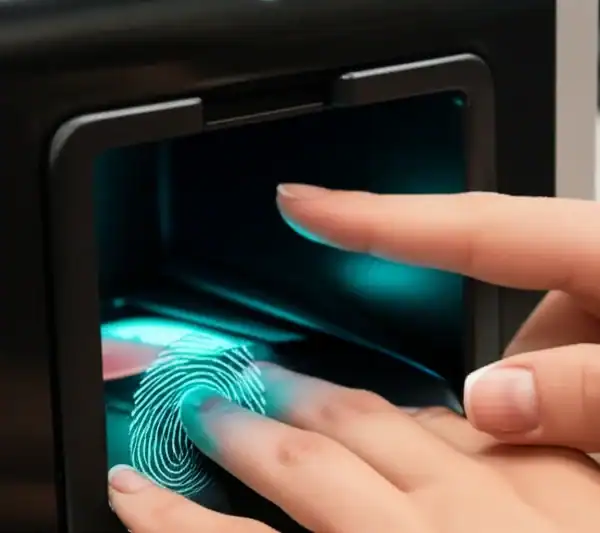
At the Counter
Once your token number is called, a DMV staff member will guide you through the next steps:
- Document Collection: They will collect your required documents.
- Photo and Vision Exam: They will take your photo and conduct a quick eye exam.
- Fee Payment: You will need to pay the required fees.
Here is a breakdown of what I paid. I recommend bringing cash to avoid the service fee charged for card payments.
| Description | Fee | Remarks |
| 1st Attempt (Failed) | $6.00 | Exam Only |
| $2.50 | Service fee for card payment | |
| 2nd Attempt (Passed) | $10.00 | Retest Fee |
| $54.25 | Learner’s Permit Fee | |
| $2.50 | Service fee for card payment |
Taking the Computer-Based Test
After paying the fees, you will be directed to a computer to take the exam.
- The test has 40 multiple-choice questions on road signs, driving guidelines and traffic laws.
- You have one hour to complete it.
- You must answer at least 30 questions correctly (75%) to pass.
- Skip any questions you’re unsure of and focus first on the ones you know well. This increases your chances of answering more easy questions (which are sometimes placed toward the end). Once you’ve built up correct answers, go back and take your time with the tougher ones. This strategy helps reduce pressure and can dramatically improve your chances of passing the DMV written test, especially if you’re a first-time test taker.
- Important Note: The test will automatically stop and fail you if you make 10 mistakes. Conversely, it will end early and mark you as passed once you answer 30 questions correctly.
Step 5: Receiving Your Temporary Learner’s Permit
After I passed the written test/exam, the DMV issued me a temporary learner’s permit on the same day. This paper permit is valid for 60 days, allowing you to start practicing with a licensed driver while you wait for your official permit to arrive in the mail. The permit requires you to have an accompanying driver who is at least 21 years old, holds a valid license, and sits in the passenger seat.
Conclusion
Obtaining a driver’s license in Florida as an immigrant can be a challenging yet rewarding journey. The process involves several steps, including gathering the necessary documents, preparing for and passing the Class E Knowledge Exam, and completing the Traffic Law and Substance Abuse Education (TLSAE) course. It’s essential to be well-prepared and organized, as each step requires careful attention to detail. By following the outlined steps and utilizing available resources like the Florida Driver’s Handbook and practice tests, new drivers can navigate the process with confidence. Ultimately, the experience not only leads to the acquisition of a driver’s license but also fosters a sense of independence and adaptability in a new environment.
I hope this helps! If you need any further assistance, feel free to ask. 😊


Leave a Comment